BEAD BOARDS

Have you ever wished there was a way to lay out designs and fiddle around with them before committing to stringing? Have you ever strung a design only to realize you forgot a bead in your pattern? Have you ever wondered how multi-strand jewelry has such evenly spaced strands? The answer to all of these questions, and more, is the BEAD BOARD.
The first thing you'll notice about bead boards are the measurements. The outside measurements are inches and the inside is centimeters. They come in single and triple channels with various small compartments dotted around the board for keeping tools, beads, clasps etc..
When designing a single-strand necklace, use the outermost channel, since this corresponds to the inch measurements.
For a 16-inch, princess length, necklace you'll want to design from the 8-inch mark to the other 8-inch mark. For a standard 18-inch necklace work from the 9-inch to 9-inch mark and so on.
When designing multiple strands, work to the same inch mark and you'll have perfectly spaced strands that won't overlap when worn.
Once you've laid out your necklace remember your clasp will add some length. Depending on the size of clasp you'd like to use it can add a quarter of an inch to one inch in length.
Bead Boards are available to purchase in our gallery at East Mountain Ranch. So go ahead - Get Stringing.
BEADS

There are a million beads to choose from... so where do you start?
Deciding how much you want to spend is always the best idea! Beads range from a few pennies to hundreds of dollars or more!
Acrylic, glass, pearl, stone, quartz, crystal, silver, gold, diamond and lots more...
Once you've decided on your price range, you need to work out how many beads you will need to complete your project. You can purchase kits from your local craft store or the individual beads themselves. See Beads here.
Any leftover beads can be used in your next project.
I usually start with a 'focal' bead. Choose a colour, size and quality that you love. This is probably going to be the most expensive bead(s) you will buy for your project.
Next find a complimentary 'accent' bead for your 'focal' bead. This is usually smaller and you may need more or less depending on your design. (For some ideas see here) Finally you may need a 'filler'. This is usually a small bead to fill the gaps, give your creation some glam or to bring the whole project to life. Silver or gold is a great idea for this.
Now place your beads on your bead board and play around with some ideas. This, for me, is always the longest part of any jewellery that I make.
Final tip...Stick to odd numbers. Beads always look better when grouped into 3's or 5's for some reason. Try it and see.
Happy Beading.
Natural, Synthetic or Imitation?

Natural gemstones are created over a long period of time without the aid of humans. They can be found in and on the earth. By the time they reach you they have been cut and
polished but not enhanced or altered in other ways. These gems often have natural flaws that make up their characteristics.
Synthetic gemstones have all the physical and chemical properties of their natural counterparts, but are made in a laboratory. Scientists use the same process, elements and conditions as in nature, but in a shorter time frame. They often look identical to natures gems but appear flawless.
Imitation gemstones are usually made of plastic, glass, porcelain or other materials and are made to look like the natural gemstones. Sometimes it is difficult to tell the difference. Cubic Zirconia is one of the best known imitations.
Mohs Hardness
The Mohs hardness scale measures the relative hardness of gemstones, as determined by their scratch hardness (the resistance of a mineral when scratched with a pointed testing object.)
| Scale | Hardness | Material Scale Number |
| 1 | Can be scratched easily with a fingernail | Sulfur: 1 - 1-1/2 |
| 2 | Can be scratched with fingernail |
Amber: 2 - 3 Ivory: 2 - 4 |
| 3 | Can be scratched with coin |
Pearl: 3 - 4 Coral: 3 - 4 Malachite: 3-1/2 - 4 |
| 4 | Can be scratched easily with a knife; cannot scratch glass | Rhodochrosite: 4 |
| 5 | Can be scratched with a knife; can just scratch glass |
Lapis Lazuli: 5 - 6 Turquoise: 5 - 6 Opal: 5-1/2 - 6-1/2 |
| 6 | Can be scratched with a steel file; easily scratches window/bottle glass |
Moonstone: 6 - 6 1/2 Tanzanite: 6-1/2 - 7 Peridot: 6-1/2 - 7 Zircon: 6-1/2 - 7-1/2 |
| 7 | Easily scratches metal, glass and softer stones |
Quartz, 7 Citrine, 7
Amethyst: 7 |
| 8 | Scratches quartz and softer stones |
Topaz: 8 Alexandrite: 8-1/2 |
| 9 | Scratches topaz and softer stones |
Ruby: 9 Sapphire: 9 |
| 10 | Scratches ruby | Diamond: 10 |
Chain Nosed Pliers

Chain Nosed Pliers are used to reach into tight places, at difficult angles, to grip components, close jumprings, bend wire and stabilize a design while working. They are available in both
long-nose, short-nose & bent nose varieties. Short-nose pliers offer more strength and stability while long-nose pliers give more reach. Bent nose are useful to get a clearer view of
your project whilst holding it steady at the same time.
Crimping Tools

Crimping tools come in various shapes and sizes. The one you see here is a two step crimper and is the most common. You can also get one step crimping tools which are a bit more
elaborate and more pricey.
Crimping beads are the tiny malleable beads that hold your stringing materials together or to a clasp.
Instructions
Step 1. Pass your wire through the crimp bead, through your clasp and return through your crimp bead to make a loop.
Step 2. Place the crimp bead in section E of your crimping tool and apply pressure
Step 3. Place the crimp bead with the flat ends at right angles to the jaws of the crimping tool in section F and again apply gentle pressure.
Your crimp bead will be flattened (E) and folded (F) which should remove sharp edges by making it round, also making it small enough to go inside a crimp cover if you decide to use
one.
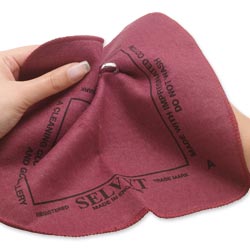
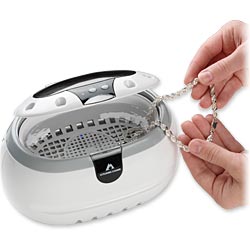
Jewellery Care

When properly cleaned and polished, jewelry maintains its value and draws the eye.
Protect your jewelry-making supplies, finished pieces & purchased items with this handy list of dos and don'ts.